Showing posts with label crafts. Show all posts

03 January 2016

shibori napkins


Holy moly, y'all. It has been a year since I posted here last. A year! How was 2015 for you? It was pretty great for me. We went to Italy, we bought a new house, we adopted guinea pigs, the kids grew like weeds. (Still, they insist on the growing. I tell them to stop, but do they listen? No.)

I'd love to say “I'm back!” but I'm not committing to that. I do have a few things I want to share with you—mostly photography nerd and travel stuff—but I don't have plans to return to regular posting. But who knows? Maybe new house projects will make an appearance. We have several in queue...

But for today, shibori! I have wanted to try shibori for the longest time. I'm kind of obsessed with navy blue (or indigo, if I'm staying true to shibori, but as you'll soon see, I'm actually not), and I love the geometric patterns that arise from the tying methods. There are several shibori tutorials around the internet. I'm not attempting a step-by-step tutorial here, though I will include some links below to the tutorials I used. But while I was searching for tying methods, I became frustrated with the lack of clear before-and-after shots showing exactly what pattern each tying method would produce. So that's my purpose here—to show you how my napkins looked tied, before dyeing, and how those same napkins looked opened up, after dyeing.

I used the following tutorials/tying suggestions:
http://honestlywtf.com/diy/shibori-diy/
http://www.aliceandlois.com/indigo-dye-series-shibori-dish-towels/
http://www.aliceandlois.com/diy-pink-shibori-cloth-napkins/
http://www.brit.co/shibori-indigo-dye-kit/
http://www.poppytalk.com/2013/04/diy-hand-dyed-shibori-pillows.html

They were all very helpful! But some of the after pictures were less than clear. So here are my notes:
-I started with 100% cotton napkins (and a tank top). Mine were homemade—my kids prefer the texture and absorbency of napkins made from flour sack towels, and I haven't found any pre-made yet—but you can use anything 100% cotton.
-I bypassed the proper indigo dye and used a box of Rit Denim Blue (double strength) I had on hand.
-I found that the size of my triangle resist (B and C, below) didn't affect the end result.
-I rolled napkin D diagonally and wrapped rubber bands around it at even intervals. It's one of my favorites!
-Napkins E, F, G, and H look remarkably similar, despite very different folding/tying techniques. (All were accordion folded, but some were folded more than others and one had resist blocks.)
-My “resist blocks” were cut up pieces of milk carton. You don't have to use wood! This felt like a huge DIY win.
-I love the patterns made from the clothespins! I wish I had done more like that. Plus—bonus!—I now have a set of navy blue clothespins. Swoon!


Questions? Let me know and I'll update the post as needed.

Oh, and here's a horrible, late night, badly lit phone pic of the tank top I dyed, because I figured someone would ask to see it. This was an old white maternity tank that is great for summer, but had some stains that kept it hanging in my closet, unworn for years. Whenever I dye fabric, I look through my closet and 9 times out of 10, I find some piece of clothing that I just don't wear because of a stain or because it was an impulse buy and it's the wrong color for me. I throw it in the dye bath and voila! A new piece of clothing for free. I probably should take in the sides and hem of this tank to make it look less like a maternity shirt...


02 February 2014

super bowl sunday

No big party. No junk food. Just one kid working on her origami valentines, the other making some rubber band bracelets, the Seahawks trampling the Broncos, and a healthy dinner. It was a quiet, pleasant Sunday at our house.


06 November 2013

owl cupcakes


My baby brother and his wife are having a baby! I guess I should stop calling him my baby brother. My SIL's baby shower had an owl/floral/woodland theme, and I was asked to make cupcakes. These are what I came up with. I love how they turned out!

The shower was a gluten-free affair, and I used Betty Crocker gluten-free mixes for the cupcakes. GF cooking from scratch is an obstacle I have not yet conquered. To make things a little more interesting, I made three different frostings. We had

  • chocolate cake with cinnamon frosting,
  • yellow cake with lemon frosting, and
  • chocolate cake with peanut butter frosting


I made marshmallow fondant owls for half the cupcakes, accenting them differently for the different cupcake flavors. One type had a pearl (sprinkle) flower, one type had (edible) glittery wings, and the last had glittery bellies. The pupils are mini chocolate chips.

The perfectionist in me sees all the flaws, but the cupcakes really were a big hit at the shower. The mama-to-be liked them, so that's a success in my book!


08 July 2013

scrappy snail

Yahoo! Scrappy Snail, or the scrappy side of my two-sided quilt, is finished! The gray and white gingham planned for the other side has larger squares and a much simpler pattern, so it should come together more quickly.

This little gem is the reason I am making a scrappy quilt. I just love these cheery dandelions and I wanted them to be out where I could see them daily, instead of sitting in my scrap basket. This one square is all I have left, and I'm so happy it's in the quilt.


And here it sits. . . waiting for its other half. . .

03 July 2013

quilt progress


Piecing! The kids helped me lay out the strips in pleasing combinations. This scrappy quilt is getting there, though it may be at a snail's pace. I think I'll call it my Snail's Pace quilt.

02 July 2013

spray painting light fixtures

When we moved in, our main bathroom had a chrome faucet, chrome light fixtures, and these “oil-rubbed bronze” towel racks. 

It makes me feel pretentious to say, or even type, “oil-rubbed bronze,” so I'm just going to say “bronze” ok? 

Now, I love the bronze towel racks. I think they go perfectly with the taupe walls. I love them so much that when it came time to replace the faucet (because Little Mister broke the old one, naturally), we took a big leap and bought a bronze faucet. It took me a few weeks to get used to the huge contrast of that dark bronze on a white sink, but it's all good now. The faucet and I are friends.

So that just left the light fixtures, still chrome, to stick out like a sore thumb. Here's the only “before” picture I could find of the light fixtures:


I didn't want to replace the light fixtures. They work perfectly fine and I think it's wasteful to replace things that don't need to be replaced. I'd heard for years about people spray painting fixtures in such situations, but was skeptical. I thought it would look like a spray painted light fixture. But I had some leftover “oil-rubbed bronze” spray paint from the front porch project three years ago, and figured I might as well try it. If it worked, it would be a free fix. If I messed it up, I'd have a reason to replace them.

I had exactly enough spray paint—primer and bronze—to coat the two fixtures. It was meant to be! And they look great. I feel so grown up with matching fixtures in the bathroom.

Of course, the shower hardware is still chrome. But it's going to stay that way. That's what shower curtains are for.


25 June 2013

impromptu art day


We didn't plan to have an arts and crafts day. But we had no structured plans, and Sweetpea's American Girl magazine came with this huge poster to color. She asked if I wanted to color it with her. How could I turn that down? There's something so relaxing about just sitting and coloring. Watching the black and white poster come alive in color was pretty fun, too.

Little Mister, who has never been one to craft without guided instruction and strong encouragement, pulled up a chair and decided to make a Perler bead model of his Lego vehicle. He used to be afraid of anything artistic—wouldn't color for fun and threw a fit when asked to draw something because he didn't know how. Nine months of kindergarten and a book of drawing instruction were the magic ingredients to transform this kid into an artist. The change is quite remarkable.

An impromptu art day with no whining or complaining. Shh. . . don't tell anyone, but I'm starting to like summer vacation.


26 December 2012

361/366 the day after


This should keep us busy for a while, don't ya think?

23 December 2012

358/366 gingerbread house

We finished our first real gingerbread house today. It was a collaborative effort, a labor of love, a test of patience, and a whole bunch of other clichés. Everyone had their own task, and I organized them all while running around like a crazed lunatic. Happy family times. ♥


21 December 2012

356/366 the shortest day of the year

And with 19 photos, quite possibly the longest post of the year. You've been warned.
 I got a new lens yesterday, the Nikon 35mm 1.8. To give it a thorough test, I decided to take pictures with it all day today. Overall, I'm happy with it. Even on this relentlessly cloudy day, it allowed me to bring in all the light I needed. Would I rather have the 35mm 1.4? Absolutely. Do I want to pay eight times more money for the 1.4? Not right now.


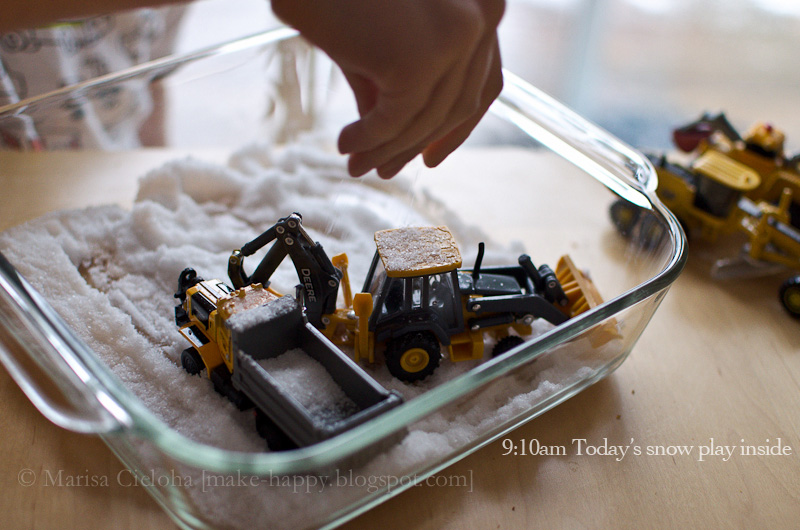
 We've driven trucks in cornmeal before. We've had truck snack time with nuts, raisins, and chocolate covered raisins before. The little guy asked if he could drive his trucks in salt this morning, to pretend they were clearing snow. What a genius.
It kept him occupied for two hours. It was a little messy, but clean up was easy.

 At lunch, we played the game where you have a name on your forehead and you have to ask questions to figure out who it is. (Does this game have a name?) It was a first for the kids, and they loved it. We played it again at dinner with Daddy.


 How gorgeous is this little bath gel pot? I want one.


 Sweetpea and I had plans for a little moss garden (thanks to the current issue of Better Homes & Gardens), but we needed a new little dish. So off to the thrift store and antique store we went.
Lucky for us, they're on the same block, just down the hill from our house.

The kids got a little history at the antique store. They explored a typewriter, a rotary phone, an even earlier type of telephone, stovetop irons, and ornate furniture. We talked about how some things have changed a lot over time,
and some haven't changed much at all.


 Cute, eh? Little $3 glass candy dish turned fairy moss garden.


12 December 2012

347/366 cardboard trees

Remember the cardboard birds? And how I said the kids wanted to make cardboard trees? We finally did. 

For each tree, I cut two tree shapes out of cardboard, and cut a slit halfway up from the bottom on one, 
and halfway down from the top on the other. (The slit should be the same width as the cardboard.)
 The kids painted them, we let them dry, and then I slid them together—gently so the paint wouldn't scratch.
It was a fun, easy craft!

And for Cathy, pictures of our real tree.
It's not our usual tree. We bought it from a school fundraiser, and it was decorated by a middle school class. It came covered in beautiful sparkly blue ornaments with sparkly blue tulle. We wanted to make it our own, so we hauled out our favorite ornaments and replaced a few of the blue ones with our sentimental ones. 

The tulle is not something I would normally have, but I really like the added sparkle. 

The red birds (you see one, but there are three) are also not something I would normally have. They were added by Sweetpea. I figure when the kids are out of the house, I'll have full reign over the tree and can decorate it any way I like. For now, it's fun to see their personalities on the tree.