Showing posts with label organization. Show all posts

15 June 2012

167/366 artwork

This is what an entire year of second grade artwork looks like. It took me an hour to photograph it all (past years have taken much longer), choose three or four keepers, sort the rest into recyclables and non-recyclables, and say goodbye. It's tough for Sweetpea to let go. 

We figured out tonight that if we'd kept all the art she had ever made, it would stack from floor to ceiling at least once, probably twice. We told her she's probably used an entire tree worth of paper. 

If she hadn't learned so much and enjoyed it so much along the way, I'd feel pretty bad about losing that tree.

29 December 2011

2011 favorites

2011 was a great year.
I can't wait to see what 2012 brings!


Photo found here.
My daughter decided to redecorate her room this year, abolishing the Princesses.
I'm embracing (and excited for!) her future and mourning the end of her babyhood.
Bittersweet, for sure.

Photo from this post.


Photo from this post.


Chocolate peanut butter pretzel balls/bars
Seeing my recipe all over Pinterest was very flattering.


Photo found here.
More on my photography journey here.
Nostalgic (for me) first post with my dslr here.

In February, I purchased my first dslr camera, a Nikon D7000. I haven't put it down since. The camera and learning photography have dominated my 2011. I have much, much more to learn and am loving every minute of my education. Many thanks to my sister-in-law Megan Cieloha and her friend Courtney from Click It Up A Notch (and several of their friends via blogs) for their tremendous help, whether they know they gave it or not.

And many thanks to all of you for reading, commenting, and encouraging me along the way! This blog would be very lonely without you. :)

08 November 2011

lego organization

Hubs and I tackled a high-priority home improvement project this past weekend.
We sorted our giant tub of LEGOs,
by type and size.

This sort of thing wouldn't usually qualify as home improvement, but believe me, it has definitely improved our home. Before, when the LEGOs lived in the giant bottomless tub, finding the tiny 1x2 smooth tile that Little Mister needed for his rescue helicopter was an agonizing chore that took three to ten minutes. And now? He can open up the “smooth tile drawer” and find exactly what he needs in five seconds. Aaah. (Sorting drawer units purchased from Lowe's hardware section for $20 each.)
Don't get me wrong—it was a pain in the tush to sort all those tiny pieces. Literally! And it took hours. But they were hours well spent, my friends. It also took hours combing through the Pick-A-Brick department, finding and stealing images for my drawer labels. But just look how beautiful they are:
I was writing this post and thinking to myself, Huh. LEGO is a funny name. I wonder where it came from? Wikipedia to the rescue. Lego is from the Danish phrase leg godt, which means play well.

Go forth and play well, my children, with your obsessively organized LEGOs.

02 October 2011

band-aid box

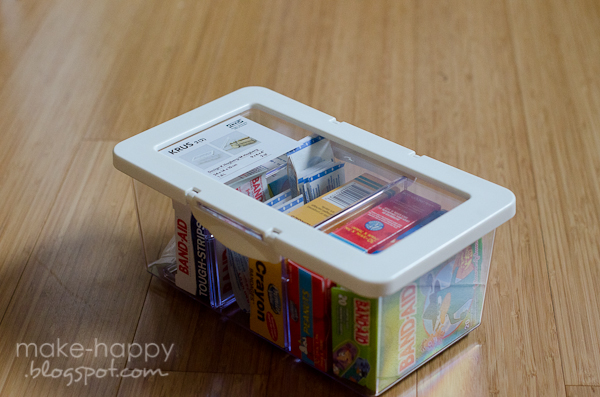
Two weeks ago on the MakeHappy Facebook page, I asked for band-aid storage ideas. I was tired of the band-aid boxes falling out of the cabinet and needed some way to corral them. My dad suggested IKEA. He's so smart.

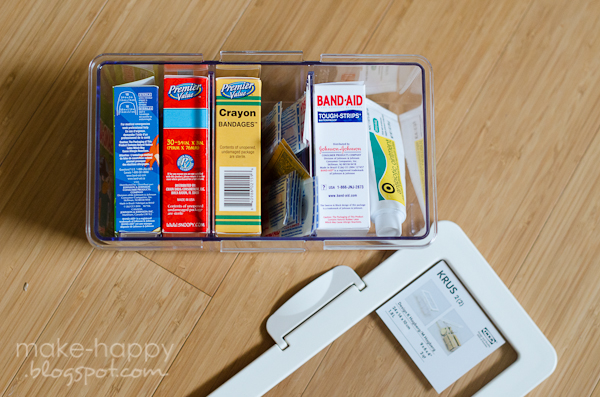
Meet KRUS, from IKEA. (Found in the kitchen storage area.)

√ Clear, so I can see through to ask child with owie which band-aid they want before I take off the lid.
√ Band-aid boxes fit perfectly.
√ There's room left for antibiotic ointment and some loose bandages.
√ I filled it to capacity with what we had, so no new band-aids until we use these up. Yessir.
√ Only $4.99. Four ninety-nine.

I'm a happy, organized mama.

05 January 2011

button, button, who's got the button?

I've been reading a lot of posts lately about organization. They usually pop up this time of year. Organization is on everyone's New Year Agenda. I read these posts, then wander in to my crime scene of a craft desk, turn around, and pretend it's not really there.

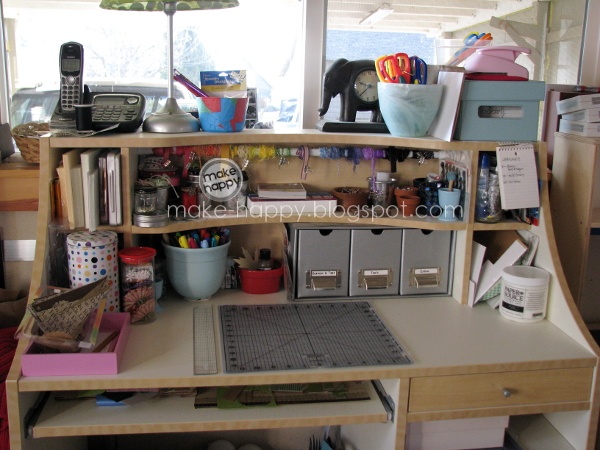
But yesterday I had a free hour (amazing!) and seized the opportunity to clear some clutter. Seriously folks, I had scraps from crafts dating back to October on that desk. Shoved, crammed, layered. . . it was pitiful. (The photo above was taken after I'd already cleared all the paper debris.)

I even took the time to step back and find some new, more appropriate, homes for several things. My biggest "Aha!" moment? Buttons.

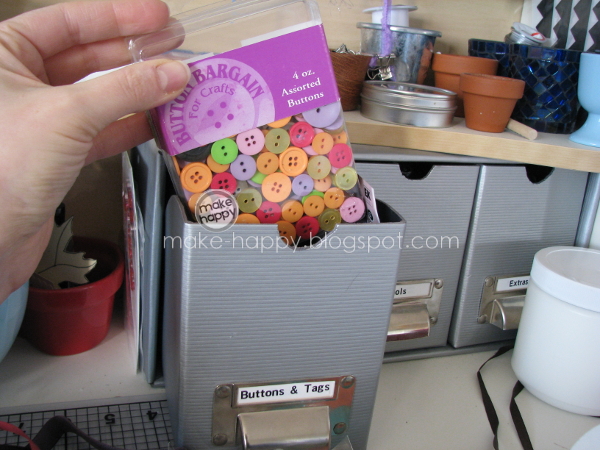
Here is the stash of buttons I reach for when I need a button. 
Nicely contained.
In a box marked "Buttons."
I appear to be organized already.

But I have this other container, with two different types of buttons.

And it does not live in the "Buttons" box.
No, no.
It lives way. back. here.
Far away from the "Buttons" box. And you know what? I never, ever use the tiny buttons or square buttons. I plumb forgot all about them. 

I love that word, "plumb." Makes me feel a little Laura Ingalls. Not Laura Ingalls Wilder, mind you, but Half Pint Laura.

Obviously, the outcast buttons needed to be moved. They needed to join their brothers and sisters, so the siblings could all live in harmony in the "Buttons" box and be loved equally.

So the square buttons were poured into the box for big buttons.

And the tiny buttons went into a box for small buttons.

And now they're all living happily ever after in the box marked "Buttons."
 The end.
Peace and harmony at last.
Birds chirping.
All is right with the world.

Bonus Tip
I discovered a big tangled mess of stray ribbon scraps while organizing.
I thought you might like to see how I organize my ribbon scraps.

Aren't those little binder clips adorable?
I wind up the ribbon, clip it securely, and toss it in a little cup with other ribbon scraps.
When I have long lengths of ribbon, I wrap them around 
a tension rod hung across the width of my desk.  
In rainbow order, of course.
Ta da! A clean desk. Mostly. It's still a bit cluttery, but it's the best I can do for now. I'm the kind of crafter that needs to see her tools all the time, or they simply cease to exist. Someday I'll have more space and can hang things in cubbies on a wall. . . or something.

Have you been organizing this week?

04 October 2010

recycled: cereal box to project holder

With my Little Mister in preschool just two days a week, it leaves us three days with Big Sister at school, Daddy at work, and the house to ourselves. Storytime at our local library (the best one in the world) is our regular Wednesday activity, so that leaves us Monday and Friday to do "projects." 

A "project" for 3yr old Little Mister can be any kind of simple craft activity. The "sticker story" I posted two weeks ago is a perfect example. Coloring sheets, free stickers from junk mail, junk mail itself (for scissor practice)–all go in the project box. Often I'll find a gem (read: a really fabulous printable) from One Pretty Thing's "Kid's Printable Roundup." Fabulous resource. 

Other great printables:

Right, right, back to my point. I collect these things throughout the week, and needed a place to store them. So I grabbed a cereal box from the recycling bin (my go-to for emergency crafts) and got crafting. 

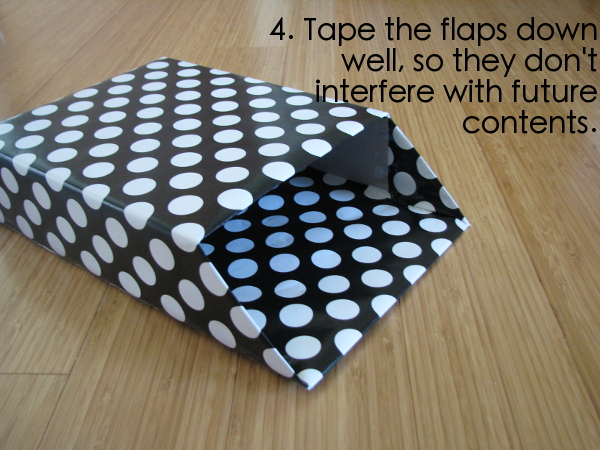
I think it's pretty self-explanatory. I labeled the process, step by step on the photos. Let me know if you have any questions.


20 July 2010

salad prep, simplified

How lazy am I? I'm so lazy, I don't even like to make salad. All that washing and chopping...ugh. I save it for last when I'm fixing dinner, because I dread it so, and I always underestimate how much time it takes to get all those veggies ready. 
You see, I'm one of those people that requires dinner prep--total dinner prep--to be 30 minutes or less. Any longer than that, and it qualifies as a special occasion.

I've tried making big salads to store in the fridge and eat over a few days, but the lettuce always gets limp. Nobody likes limp salad.

My solution? Frozen veggies. Steamed in the microwave.  So much easier.

However, Hubs likes salads. Big, loaded with veggie salads. And...salads are healthy. A variety of fresh, raw veggies is undoubtedly (though only slightly) healthier than steamed broccoli every night. Plus, who wants to eat warm steamed veggies when it's 95° outside?

But I finally figured out a time-saving trick. I can prep the cruciferous, firm veggies all at once, keep those in the fridge, and just add them to lettuce/cukes/tomatoes/etc. when it's time for dinner. It cuts my salad-making time in half. 

Probably even less than that. 

Awesome.

13 July 2010

diy mini magazine file to corral books for kids


Sometimes I get these sudden {lightbulb!} crafty ideas. They're usually a solution to a problem I've been having, and I have to do them immediately or I'll lose momentum and they'll never get done.

This was one of those ideas. I'm attempting to declutter my house this week, one cluttery station at a time. Station one was the coffee table.
I love our coffee table. It's from IKEA, and has these great cubbies. (Ours is made of very soft wood, however, and has a million little dings in it. I just call it "distressed.") Before kids, we used them to store DVDs. After kids, they've been used for books, toys, and puzzles. But these little magazines, though fabulous for educational purposes (see below), were getting out of control. I needed something to corral them.

I searched the house for a low basket, open box…but found nothing. I didn't want to go out and buy something (or, rather, Hubs wouldn't want me to go out and buy something), so I knew I would have to create my own solution. I did some more looking around the house and saw some magazine files, and then BAM. The solution hit me. I needed a low, wide magazine file. And I had just the box to make it work.

Off I went, crafting away. All my plans for working out and weeding the garden went right out the window. I'll exercise later, I said (and I actually did), I'll weed tomorrow.

I started by taping the bottom of the box back up, because I pulled this box right out of the recycling bin.

Then I measured my cubby, checked the orientation of the books, and made sure my creation would fit. OK, so, maybe I cut the box first, checked it, and then measured and recut. No harm done.

Then came the fun part. I obviously didn't want my mini mag file to scream "Sandwich bags!" So I pulled some paper bags out of the recycling bin, tore them up into small pieces, and Mod Podged them on.

I let the kids help. I'm not sure if this was a good idea, as they ended up with glue all over their clothes and hair. But for the most part, they had fun. And we were outside, so I didn't have to worry about off-body messes. (Note: if you get Mod Podge on your clothes, wash it off right away. If you don't notice it and it dries, it's there forever.)
We painted glue on, slapped on some pieces of paper, and slathered with more glue. Don't be skimpy with the Mod Podge. You want the whole thing, and all the pieces of paper, covered.
It was a warm and dry morning, so it only took about an hour or two for the Mod Podge to dry completely. Good thing--I was really excited to gather up the books and put the mini mag file to work.
Look at that! So much neater. I love it.

The only thing I would change about it is the bottom. I covered the bottom in paper and Mod Podge, and the tackiness of the Mod Podge sticks to the table a little. Not enough to pull paint off or anything, but just enough to make the box difficult for little hands to remove. If it becomes too much of a problem, I'll double-stick-tape another piece of paper over the bottom surface.

By the way, the books (magazines, really...kiddie periodicals) in the mini mag file are Tessy & Tab, Wild Animal Baby, and National Geographic for Little Kids. We love them all so much. Tessy & Tab is Portland-made, and hands down the best way to encourage early literacy. Wild Animal Baby and NG Little Kids are full of animal info, games, fun recipes and craft ideas. Check out the websites, and ask me for more info. All are appropriate for ages 2-4. (The companies behind WAB and NGLK have other publications for older kids as well.)