Showing posts with label gifts. Show all posts

03 January 2016

shibori napkins


Holy moly, y'all. It has been a year since I posted here last. A year! How was 2015 for you? It was pretty great for me. We went to Italy, we bought a new house, we adopted guinea pigs, the kids grew like weeds. (Still, they insist on the growing. I tell them to stop, but do they listen? No.)

I'd love to say “I'm back!” but I'm not committing to that. I do have a few things I want to share with you—mostly photography nerd and travel stuff—but I don't have plans to return to regular posting. But who knows? Maybe new house projects will make an appearance. We have several in queue...

But for today, shibori! I have wanted to try shibori for the longest time. I'm kind of obsessed with navy blue (or indigo, if I'm staying true to shibori, but as you'll soon see, I'm actually not), and I love the geometric patterns that arise from the tying methods. There are several shibori tutorials around the internet. I'm not attempting a step-by-step tutorial here, though I will include some links below to the tutorials I used. But while I was searching for tying methods, I became frustrated with the lack of clear before-and-after shots showing exactly what pattern each tying method would produce. So that's my purpose here—to show you how my napkins looked tied, before dyeing, and how those same napkins looked opened up, after dyeing.

I used the following tutorials/tying suggestions:
http://honestlywtf.com/diy/shibori-diy/
http://www.aliceandlois.com/indigo-dye-series-shibori-dish-towels/
http://www.aliceandlois.com/diy-pink-shibori-cloth-napkins/
http://www.brit.co/shibori-indigo-dye-kit/
http://www.poppytalk.com/2013/04/diy-hand-dyed-shibori-pillows.html

They were all very helpful! But some of the after pictures were less than clear. So here are my notes:
-I started with 100% cotton napkins (and a tank top). Mine were homemade—my kids prefer the texture and absorbency of napkins made from flour sack towels, and I haven't found any pre-made yet—but you can use anything 100% cotton.
-I bypassed the proper indigo dye and used a box of Rit Denim Blue (double strength) I had on hand.
-I found that the size of my triangle resist (B and C, below) didn't affect the end result.
-I rolled napkin D diagonally and wrapped rubber bands around it at even intervals. It's one of my favorites!
-Napkins E, F, G, and H look remarkably similar, despite very different folding/tying techniques. (All were accordion folded, but some were folded more than others and one had resist blocks.)
-My “resist blocks” were cut up pieces of milk carton. You don't have to use wood! This felt like a huge DIY win.
-I love the patterns made from the clothespins! I wish I had done more like that. Plus—bonus!—I now have a set of navy blue clothespins. Swoon!


Questions? Let me know and I'll update the post as needed.

Oh, and here's a horrible, late night, badly lit phone pic of the tank top I dyed, because I figured someone would ask to see it. This was an old white maternity tank that is great for summer, but had some stains that kept it hanging in my closet, unworn for years. Whenever I dye fabric, I look through my closet and 9 times out of 10, I find some piece of clothing that I just don't wear because of a stain or because it was an impulse buy and it's the wrong color for me. I throw it in the dye bath and voila! A new piece of clothing for free. I probably should take in the sides and hem of this tank to make it look less like a maternity shirt...


20 July 2013

milty

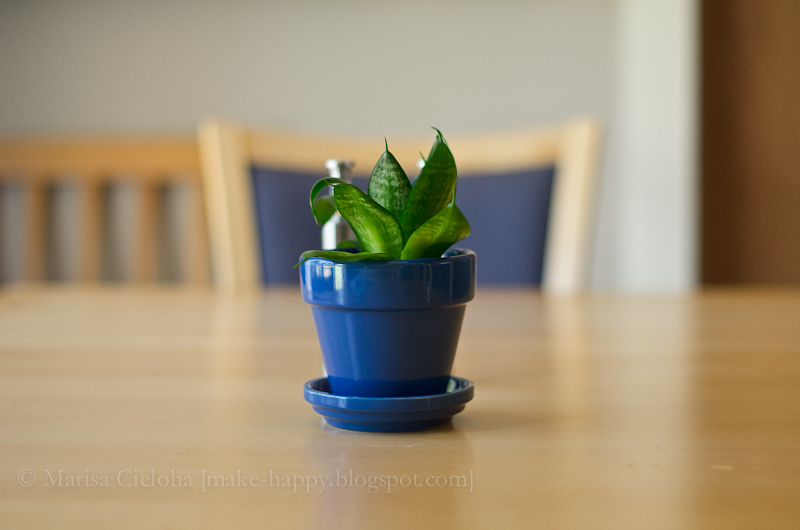
Sansevieria. Snake plant. Mother-in-law's tongue. Whatever you call it, my mom gave me a baby one last week and I'm loving it. It's supposed to be nearly impossible to kill, which is great for me.

I read earlier that the plants with striped leaves, like this one, are “snake plants” and that “mother-in-law's tongue” plants have leaves with yellow borders. It's too bad, because I already named him Milty. And the name is sticking.


18 January 2013

happy friday!

  1. I'm so glad it's Friday. Influenza is going around my kids' school like gangbusters, and many kids are severely sick. A quarter of the student body was out yesterday. I almost kept my kids home today just to keep them away from the germs. But it's a three day weekend, and we've been eating oranges daily for the last few weeks (go vitamin C!), so I'm hopeful we'll avoid illness. We're washing hands and hydrating and I bought more oranges today.
  2. I've been working on my family Blurb books every waking moment this week. I do one for each year to document all our favorite pictures and events. I finished 2010! Woo! Only 2011 and 2012 to go, and I'm hoping I can get started on 2013 before the year is over.
  3. I haven't picked my camera up in several days. The break has been really nice, but I need to pick it up soon before I forget everything I've learned.
  4. I made this crock pot cheesecake. My 6" springform pan has a large base and wouldn't fit in my crock pot, so I used a glass baking dish, and set it into the water bath. I followed all the other directions, but the cheesecake was still underdone after the cooking/cooling process. I finished it in the oven. It was delicious! I subbed vanilla for the almond extract and topped it with sour cherries. Yum.
  5. Hubs gave me a few pairs of Darn Tough socks for Christmas. Full cushion, baby! They keep my feet so warm. I love them. I need some more. My feet are constantly cold from late fall to early spring, but these socks + slippers inside and these socks + my favorite boots outside make the chill manageable. (The boots are a few years old, so not readily available. But the wool lining is the key. So warm!)

Off to do more Blurbing before the kids come home. Have a great weekend!

04 November 2012

homemade/recycled wrapping paper

I was cleaning out some boxes today and found some brown packing paper. Whenever we have some, we smooth it out and I let the kids go to town decorating it for use as wrapping paper. They decided to make Christmas wrapping paper this time, and it was so fun and festive, we opted to hang it up until it is needed. Our first Christmas decoration of the year!

25 March 2012

85/366 chinese dinner


We spent the day with family for our annual Chinese dinner. Each year, my husband and his father dedicate an entire weekend to preparing a delicious feast for us, in honor of my husband's grandfather's birthday. It is a cherished event for all of us.


I was thrilled to use my new glass teapot and blooming tea.
Thanks again, Paul and Leanna!
The beautiful tea was the perfect accompaniment.

14 February 2012

felt valentines/handmade love


I found the tutorial for these felt valentine envelopes on Everyday Celebrations.
So cute. The kids loved them this morning.


Love is from the heart.


Love is warm, fuzzy, and handmade.


Love is pricking your finger twenty times while making valentines.


Love is wearing paper clip necklaces made by your children, even in public.


For fun, here's a “pull back” of my set up for the felt envelope photos. I don't think to use reflectors very often, but this rainy day required one. I just used a white foam core board, propped against my precariously balanced chalkboard. I stuck a candy box under the valentines so they wouldn't get chalky. It worked well!

12 February 2012

super easy valentines


The little dude is not crafty. He saw his sister meticulously crafting her mailbox valentines, and wanted nothing of the sort. So he chose a box of valentines from the store, and some cute little bubble accessories. (We were going to do the bubbles with an attached tag + stickers, but the box of valentines was actually cheaper!) Super easy, quick, but still fun and a little more exciting than the valentines alone.

We began by assembling the boxed valentines. (They came with temporary tattoos that needed to be separated and attached.) My little guy is a big fan of order, so he spent some time matching the tattoos to the corresponding valentines. There weren't enough for all of them to match, so we had five or so at the end that didn't match. He was surprisingly ok with this.


After writing names on all of them, we punched holes in one corner, cut some ribbon, and used the ribbon to tie on the bubbles. Easy peasy. Still a little crafty, but he actually enjoyed helping. He got to pick the color of the ribbon and bubbles—he likes having that control. I was thankful for the time we spent assembling. :)

This photo borrowed from the other day


27 January 2012

felt heart bookmarks


As I mentioned on the MakeHappy Facebook page, the kids and I tried some hand-sewing on one of our snowed-in days last week. We made felt heart bookmars, inspired by this post. We think they are really cute, and the kids had fun sewing them. I was nervous giving my little guy a needle and thread, but he did a wonderful job and was so patient while I helped his sister. His is the blue, hers is the red. She went all out and added her teacher's name in beads. (I don't think her teacher knows about this blog, so hopefully her Valentine gift will remain a surprise!)

My only issue with these is that I don't love the way the paper clip wrinkles the pages when used as bookmarks. I like to keep my books pristine. Do you have any suggestions for something else?

Criteria:
1) Sturdy, not paper
2) Can be sewn/attached inside the felt heart sandwich
3) Doesn't wrinkle pages when used as bookmark


22 January 2012

22/366 mailbox valentines


Today was hopefully our last day trapped in the house. We weren't really trapped today, but freezing rain prevented us from attending my nephew's first birthday party in Gresham. Boo.

Sweetpea and I figured we'd get a head start on her class valentines, since we had time. We ended up finishing them! It took us about two hours to put together 30 of these mailbox valentines. I've never had valentines done this early. It feels so strange. Good, but strange.

I found the idea on Pinterest, and tracked it back to Gigi's Creative Designs blog. She has the materials list on her Valentine Mail Box post, and the dimensions for the card stock strips. So head over there for the details.

She did not, however, have clear assembly directions. So I played around with the strips and photographed they way we assembled them.

Note: Sweetpea is seven, but she needed quite a bit of help with assembly. The strips need to be pulled tightly around the Hershey Nuggets for a secure hold.


If I were concerned with these looking perfect, I would have used hidden double sided tape. But since they're for a class of second graders, the paper mailbox will probably be ripped apart immediately to access the candy. So we went the easy—and less expensive—route and used regular transparent tape.


Aren't they adorable? Oh, and since Hershey Nuggets are processed in a facility that also processes tree nuts, we used Starburst (three, stacked, then turned on their sides) for the kids in the class with nut allergies. Happy almost Valentine's Day!

29 December 2011

2011 favorites

2011 was a great year.
I can't wait to see what 2012 brings!


Photo found here.
My daughter decided to redecorate her room this year, abolishing the Princesses.
I'm embracing (and excited for!) her future and mourning the end of her babyhood.
Bittersweet, for sure.

Photo from this post.


Photo from this post.


Chocolate peanut butter pretzel balls/bars
Seeing my recipe all over Pinterest was very flattering.


Photo found here.
More on my photography journey here.
Nostalgic (for me) first post with my dslr here.

In February, I purchased my first dslr camera, a Nikon D7000. I haven't put it down since. The camera and learning photography have dominated my 2011. I have much, much more to learn and am loving every minute of my education. Many thanks to my sister-in-law Megan Cieloha and her friend Courtney from Click It Up A Notch (and several of their friends via blogs) for their tremendous help, whether they know they gave it or not.

And many thanks to all of you for reading, commenting, and encouraging me along the way! This blog would be very lonely without you. :)

20 December 2011

cinnamon applesauce ornaments

Over the summer, I discovered a jar of cinnamon in the pantry. I have no idea how old it was, but it was old and long forgotten. I scrawled “For Ornaments” across the label and set it where I could see it, so I'd remember in December to use it for cinnamon applesauce ornaments.

Some friends of ours, two states ago, gave us a cinnamon applesauce ornament. It's been one of my favorites for years and always makes the cut for tree decorating. (Depending on our selected tree, we don't always hang every ornament.) I've always wanted to try making cinnamon applesauce ornaments, and this was the year to do it.

We used this recipe from 33BarefootLane, because I loved the addition of cloves and nutmeg. These ornaments—and the whole house—smell amazing! I was too impatient to let them completely air dry, though. I baked them at 170° F for two hours, turning every 30 minutes, and then let them sit out another 24 hrs. This morning we brushed silver acrylic paint on one side, then added green, red, and silvery white glitter.

I immediately wanted to make another batch, but I'm holding off for next year. I'm keeping my eye out for some clearance cinnamon. ;)

After ornament painting, some long-time friends of ours came over for a game day. With all the electronic entertainment that occupies kids these days, I find it's really nice to have an old-fashioned round of board games. Last month I organized an after school class at our elementary school—all we did was play board games for an hour. It was a huge hit, and I'm planning to make it a regular offering.


We've been running around like crazy these last few weeks, and it was lovely to slow down and just play. With no school this week and no plans until Saturday, I'm hoping to “slow down and just play” for the next few days. A little wrapping, a little baking, a lot of reclining and snuggling.